Changing the active partition is a fairly advanced task, so if you are planning on doing this, you probably didn’t need the explanation above! Only change the active partition if there is an operating system residing on that partition, otherwise you will have a non-working computer. Also, there are a few things to note about marking a partition as active: In addition to the above notes, there are additional things that have to be in place in order for the system to boot. Just setting a partition to active does not ensure that the system will boot properly. When the computer boots up, it will look for an active partition on the primary partitions first. The boot sector, located at the beginning of the active partition, will run the boot loader, which knows the location of the operating system boot files. At this point, the operating system will boot up and run.
Set Active Partition via Disk Management
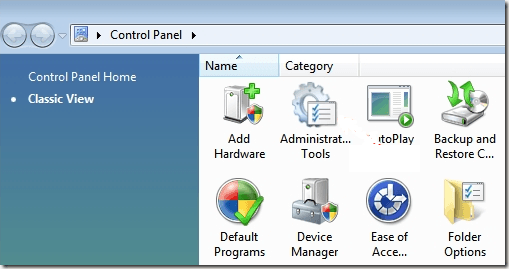
Open Computer Management by going to the Control Panel, clicking on System and Maintenance, and then clicking Administrative Tools.
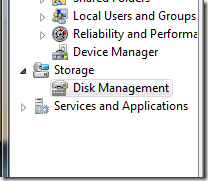
You can also click Classic View and then choose Administrative Tools. Now click on Disk Management under Storage.
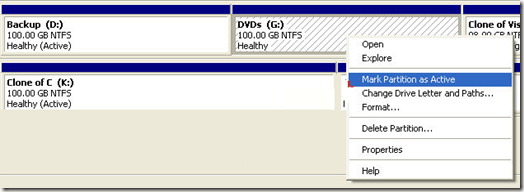
Another option is to go to your desktop, right-click on Computer or This PC and choose Manage. You’ll see Disk Management in the left hand menu like shown above. Right-click on the primary partition that you want to mark as active and choose Mark Partition as Active.
Set Active Partition via Command Line
If you screwed something up in Windows and marked the wrong partition as active, you will no longer be able to boot your computer. In the case where you cannot mark a partition as active using Windows, you’ll have to us the command line. Depending on your version of Windows, getting to the command line can be a bit tricky. Read my post on restarting Windows in safe mode to get to the system repair options for Windows XP, Vista, 7, 8 and 10. If you’re running Windows 8, read my post on booting to system recovery options. Once there, you have to go to Troubleshoot, then Advanced Options, and then click on Command Prompt.
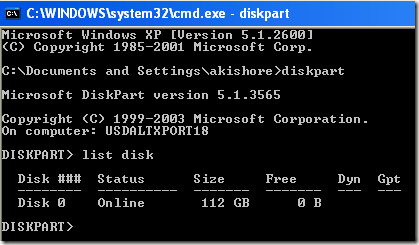
First get into the command prompt using a boot up disk and type diskpart at the prompt.
At the DiskPart prompt, type in list disk. You will see the list of disk currently attached to your computer. Now type in select disk n, where n is the disk number. In my example, I would type select disk 0.
Now that we have selected the correct disk, type in list partition to get a list of all the partitions on that disk. To select the partition we want to set as active, type in select partition n, where n is the partition number.
Now that we have selected the disk and partition, we can mark it as active by just typing the word active and pressing Enter. That’s it! Now the partition is set. Most people are familiar with using FDISK to mark a partition as active, but that is now an older and outdated command. You should use DISKPART to manage disk and partitions on a modern Windows computer.
Set Active Partition via MSCONFIG
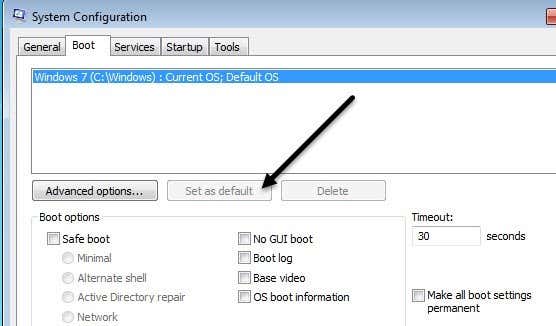
In addition to the above two methods, you can use MSCONFIG to set the active partition. Note that this method only works for primary partitions on the same hard drive as MSCONFIG won’t detect partitions on other hard drives. Also, the other partition can only have Windows installed in order to set it as active. If you’re not familiar with the MSCONFIG tool, read my previous guide on using MSCONFIG. Open MSCONFIG and click on the Boot tab.
You’ll see the operating systems listed and the active one will have Current OS; Default OS after the name of the operating system. Click on the other operating system and then click on Set as default. There are other methods to set an active partition like using a Linux live CD, but these are much more complicated and normally not necessary. Even if the built-in system recovery options don’t allow you to get to the command prompt, you can always use a secondary computer to create a bootable USB system recovery drive. If you have any trouble, feel free to post a comment. Enjoy!
